Easy Kalua Pig and Crusty French Rolls
 |
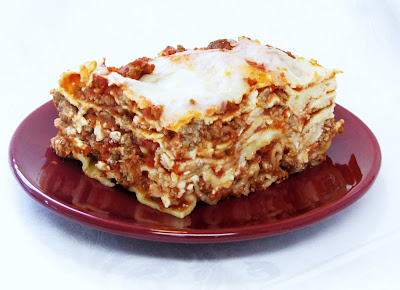
| I added traditional southern sides to my "Kalua" pig. |
Have
you got a crowd to feed? I've got the dish for you! We recently had a
mini family reunion of sorts. My brother and his wife, just home from
a two-year mission to Tonga, drove up from California with their
youngest daughter at the same time both of our girls were home for a
visit. Add my parents, husband and son, and that made ten of us for a
Father's Day feast.
I
wanted a simple dish I could prepare ahead of time. Since we were
honoring three fathers, I didn't want the men out grilling fish,
tri-tip or hamburgers in the sweltering sun. I flipped through one of
my church cookbooks and landed on Easy Kalua Pig, contributed by my
friend, Kay Tano. Melt-in-your-mouth pork done in the slow cooker?
Sounded like just the ticket to a fuss-free dinner.
Kalua,
according to my friend Andy, who was raised on The Big Island, is the
Hawaiian word for the method of cooking using an imu or underground
oven. (Not to be confused with Kahlúa,
which is a Mexican coffee liquor.) Kalua Pig is the traditional meat
served at a luau.
I
don't remember much about the food at the luaus I went to as a child
during the two years we lived in Hawaii. I was probably too picky to
try the traditional side dishes like lomi lomi salmon, poi or poke. I
do, however, have a fondness for southern barbecue. While the cooking
differs slightly from Kalua Pig, the flavor is quite similar.
Family
reunions in South Carolina included a trip to the famous Sweatman's Bar-b-que in Holly Hill, an hour's drive from my mother's hometown of
Charleston. Like Scarlett O'Hara and her unbridled enthusiasm to “eat
barbeque,” we piled our Styrofoam plates high with smoky pulled
pork, baked beans, coleslaw, macaroni & cheese and cups of banana
pudding for dessert. The family that eats together, stays together!
For
this family dinner, I decided to go the southern route and served my
“Kalua” Pig sandwich-style on crusty French rolls. Barbecue sauce
was available for those who wanted it, but this meat had plenty of
flavor without dressing it up. The pork cooks for 15 to 20 hours on
low. I started it Saturday night before bed and it was falling-apart
tender when I served it, to rave reviews, Sunday afternoon. The
rolls, too, can be mixed and shaped the night before.
Food
brings us together. If the promise of a sumptuous meal gets people to
the table, I'm eager to do my part in the kitchen. Easy Kalua Pig is
a dish that feeds many mouths with minimal prep and lets you focus on
family fun.
Easy
“Kalua” Pig
You
can find nearly identical recipes for Kalua Pig all over the
Internet. With only three ingredients, there's not much variation. I
used my friend Kay's recipe from our church cookbook and added many
preparation details of my own.
1 (6
lb.) pork butt roast
1 ½
tablespoons sea salt
1
tablespoon liquid smoke
A word
about ingredients:
The
pork butt I bought was bone-in and labeled “Pork Shoulder/Boston
Butt.” The bone adds flavor while cooking and is easily pulled out
when the meat gets tender.
Some
recipes call for special Red Hawaiian sea salt. I used the sea salt I
use for just about all my cooking, which is Redmond's Real Salt.
Liquid
Smoke comes in several varieties: Mesquite, hickory, applewood, etc.
I used hickory, but some recipes suggest that mesquite is closest to
the kiawe wood traditionally used when cooking Kalua Pig in the
ground.
Method:
Pierce
the meat all over with something sharp, like a carving fork. I used a
metal shish kebab skewer. An ice pick would work, also. Rub the salt
all over the meat. Drizzle with liquid smoke and rub that in too.
Place the roast in a slow cooker, cover and cook on low for 15 to 20
hours, turning once during the cooking period. Do not add any liquid!
The roast will cook in its own juices and become falling-apart
tender. I started my roast at 10:00 P.M. and served it at 5:00 P.M.
the next day. It was perfect!
When
ready to serve, remove the bone and transfer the meat to a cutting
board using tongs or a slotted spoon. Shred the meat using two forks
or chop it with a large knife. (I removed some of the fat from the
meat before shredding, because I couldn't bear to mix it all in, but
this is in no way a low-fat dish.) Add some of the juices from the
slow cooker to moisten the shredded meat, if needed. Serve
immediately.
Yield:
I fed ten people and had enough meat leftover for another five or six
servings. If you want to try a smaller amount, the butcher said you
could use a few boneless pork ribs instead of a pork butt. Of course,
you'll need to decrease the salt and liquid smoke proportionately.

Crusty
French Rolls
I've
adapted these rolls from Peter Reinhart's recipe for Classic French
Bread in his book Artisan
Breads Every Day.
Kneading takes only a few minutes and is easily done by hand. Best of
all, the rolls can be mixed, shaped and refrigerated overnight. The
next day, just pop them into the oven for about 20 minutes and serve
them warm. This recipe yields 40 oz of dough, which will make 13 (3
oz) rolls or 20 (2 oz) rolls. I used the larger rolls for sandwiches.
5 1/3 cups (24 oz) unbleached bread
flour
2 teaspoons (0.5 oz) sea salt
2 ¼ teaspoons (0.25 oz or 1 pkg.
instant yeast (Red Star Quick-Rise or bread machine yeast)
2 cups (16 oz) lukewarm water
Measure the flour, salt and yeast
into a large mixing bowl. Stir to combine and then add the water.
Stir well with a large spoon for about 1 minute, until it forms a
shaggy dough. Let it rest, uncovered, for 5 minutes.
Turn the dough out onto a floured
board and knead gently by hand for about 3 minutes, adding as little
flour as possible, until the dough becomes smooth and elastic, but is
still just a bit tacky. If you touch it with a dry finger, it should
cling ever so slightly, but not stick.
Place the dough in a lightly oiled
container, cover and let rise at room temperature until doubled in
size, about 90 minutes. Turn out onto a floured board and divide into
2 or 3 oz pieces. Shape each piece of dough into a ball by placing it
in the palm of one hand and using the fingers of your other hand to
bring the edges to the center and pinch them together tightly,
creating a smooth top. Place the rolls a few inches apart on a
parchment-lined baking pan. Spray lightly with oil, cover the pan
well with plastic wrap and refrigerate overnight. (The oven bags made
for roasting a turkey in fit well over a standard 18 x 13 half sheet
pan. You won't be able to use a twist-tie, but you can tape the end
to the underside of the pan.)
The next day, remove the pan from
the refrigerator 1 hour before you plan to bake. If you have a baking
stone, place it on the center rack of the oven. Place a steam pan
(see note below) on the bottom rack. Preheat the oven to it's highest
setting for at least 45 minutes.
About 10 minutes before baking,
uncover the rolls to let the surface of the dough dry slightly. Just
before putting the pan in the oven, slash the tops of the rolls about
1/2-inch deep with a serrated knife or snip the tops with kitchen
shears. Have a cup of hot water ready and waiting. Place the pan on
the baking stone or center rack. Cover the oven window with a dry
dish towel (to prevent splashes that could crack it), carefully (use
oven mitts) pour the hot water into the steam pan on the bottom rack,
quickly remove the towel and shut the door. Reduce the heat to 450
degrees.
Bake the rolls for 12 minutes.
Carefully remove the hot steam pan and rotate the pan of rolls for
even baking. Bake an additional 8 to 10 minutes, until a deep, golden
color. (If you remove the rolls too soon, the crust will soften as
they cool. If you have a thermometer, you want an internal
temperature of at least 200 degrees.) Cool slightly on a wire rack
and serve warm with butter or sliced in half for sandwiches.
A
word about baking stones and steam:
A
baking stone is not necessary for baking these rolls, but it does
conduct heat more quickly through the dough, helping the rolls rise
higher in the oven. If you bake much at all, a stone is a good
investment. My stone “lives” in one of my ovens. I bake hearth
loaves, baguettes and pizzas directly on the hot stone, but I also
bake pies, tarts and rectangular sandwich loaves in their pans, on
top of the stone. You must preheat a baking stone on the oven rack
for 45 minutes before using to give it time to absorb heat.
Steaming
the oven during the first half of baking is essential to produce a
great crust on these rolls. The method I use is to place a heavy-duty
pan on the bottom rack of the oven, below and to the side of the
baking stone (or where you will place the pan of rolls). A cast iron
pan or small, shallow baking pan will work (though it may warp). The
pan will be preheated to the oven's highest temperature along with
the stone. Hot water added at the beginning of the bake will produce
the blast of steam needed for hard, crusty rolls. Alternatively, you
can spritz the oven with water from a clean spray bottle several
times during the first 5 minutes of baking, but you lose oven heat
each time you open the door.